

ICE raids are designed to create fear, confusion, and silence — not safety. When federal agents start operating in your town, the most powerful thing you can do is stay informed, prepared, and connected to your community. This survival guide walks through practical, lawful, and people-first steps to protect yourself and others before, during, and after ICE activity, with a focus on de-escalation, documentation, and mutual aid. Preparation isn’t panic — it’s protection.
Skill Level: Essential
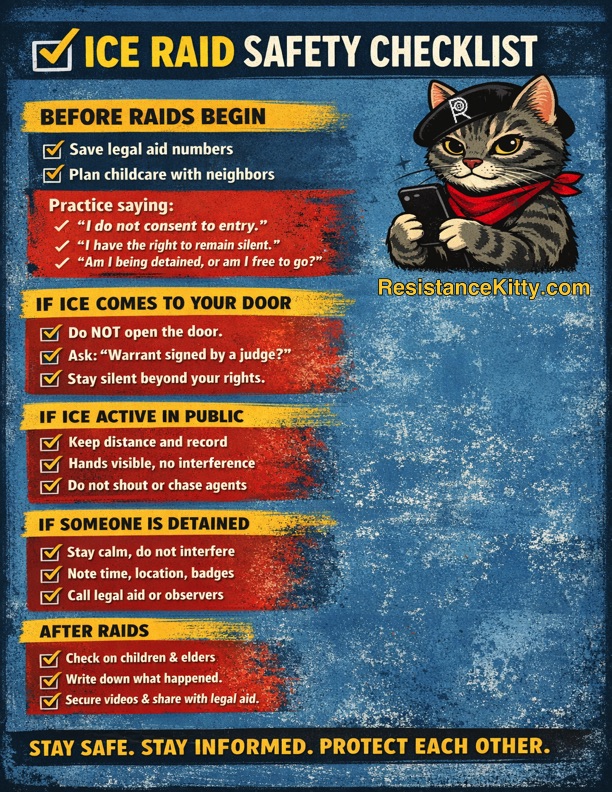
What This Guide Is
This guide is about staying safe, calm, and legally protected when ICE activity occurs in your town. Raids are designed to produce fear, confusion, and mistakes. Preparation reduces harm, protects families, and prevents panic-driven decisions that can make situations worse for everyone involved — including bystanders.
This is not about hiding, evading law enforcement, or interfering with operations. It is about knowing your rights, protecting vulnerable people, documenting safely, and supporting your community.
Why This Matters
ICE raids don’t only affect the people being targeted. They traumatize children, destabilize neighborhoods, and put bystanders at risk of injury or legal trouble. When people don’t know their rights, they may consent to things they don’t have to, overshare under stress, or act in ways that escalate danger.
Prepared communities experience less harm, fewer injuries, and stronger legal outcomes afterward.=
STEP-BY-STEP: HOW TO PREPARE, RESPOND, AND RECOVER
STEP 1: Learn and Practice Your Rights
Everyone in the U.S., regardless of immigration status, has constitutional protections.
You have the right to:
- Remain silent
- Refuse consent to searches
- Ask if you are being detained or are free to leave
- Decline to open your door unless presented with a judicial warrant signed by a judge
Practice saying these calmly:
- “I do not consent to entry.”
- “I am exercising my right to remain silent.”
- “Am I being detained, or am I free to go?”
Practicing ahead of time prevents panic-talking.
Helpful reference:
- ACLU Know Your Rights (Immigration): https://www.aclu.org/know-your-rights/immigrants-rights
STEP 2: Build a Small, Trusted Safety Network
Do this before raids begin.
Coordinate with neighbors or friends you trust to:
- Watch children temporarily
- Care for pets
- Translate if needed
- Call legal aid or emergency contacts
- Find a local safe house you can hide out in if needed
Keep:
- One shared emergency contact list
- One designated point person for updates
- Phone numbers written down (not just stored digitally)
Community coordination saves time when minutes matter.
STEP 3: Prepare a “Raid-Ready” Safety Kit
This is about reducing chaos, not hiding.
Recommended items:
- Fully charged phone + battery pack
- Written emergency contacts
- Necessary medications
- Medical info card
- Pen and paper
- Comfortable shoes
Helpful items:
- Portable battery pack (example): https://www.anker.com/products/power-banks
- Small document folder (for medical info, contacts): https://www.staples.com/document-folders/cat_CL140399
For families:
- Child care instructions
- School pickup authorization
- Medical consent forms if applicable
STEP 4: If ICE Comes to Your Door
Stay calm. Do not open the door immediately.
You may:
- Ask them to slide the warrant under the door or hold it up to a window
- Read it carefully
- It must be signed by a judge
- It must list the correct name and address
If it is administrative ICE paperwork, you are not required to open the door.
Do not argue. Calm repetition is safer than confrontation.
STEP 5: If ICE Is Operating in Public
If you are not the target:
You may legally:
- Observe from a safe distance
- Record in public as long as you do not interfere
- Keep your hands visible
Avoid:
- Physical interference
- Yelling instructions
- Chasing agents or vehicles
Your role is witness, not rescuer.
Helpful tools:
- Phone recording with cloud backup enabled (e.g., iCloud, Google Photos)
- Take ICE Watch Training
- Use this Took-Kit
STEP 6: If Someone Is Detained Nearby
What helps:
- Calm presence
- Safe documentation
- Legal observers
What makes things worse:
- Physical interference
- Shouting directions
- Creating panic
If safe:
- Note time, location, badge numbers if visible
- Record from a distance
- Contact local legal aid or rapid response groups
STEP 7: Care for the Community Afterward
Raids cause shock and trauma.
Do:
- Check on children and elders
- Offer water and quiet space
- Share verified information only
Avoid:
- Rumors
- Graphic retelling
- Social media speculation before documentation is secured
Trauma care is resistance.
STEP 8: Document What Happened
As soon as possible:
- Write down what you witnessed
- Save videos securely
- Share documentation with legal aid organizations before posting publicly
Documentation helps protect future cases and patterns of abuse.
STEP 9: Strengthen Long-Term Protection
After raids:
- Attend know-your-rights trainings
- Support local legal defense funds
- Build rapid response trees
- Pressure local officials for transparency and oversight
Prepared communities are harder to terrorize.
🐱 Final Word from Resistance Kitty
Fear is the weapon. Preparation is the shield. You don’t need to be fearless — you need to be informed, connected, and calm. Raids rely on confusion. Communities survive through knowledge, solidarity, and care. Protect each other. Stay lawful. Stay human.
Authoritarian systems rely on isolation and fear to function. Community safety breaks that cycle. Whether you’re directly impacted or standing in solidarity, these tools help reduce harm, protect rights, and keep people alive. Share this guide, train with others, and remember: watching out for each other is not radical — it’s human.

